Remove all Office 365 licenses for a user

Introduction to Licensing

A common task for Microsoft Office 365 Administrators is to remove all Office 365 licenses for a user. There is no “one click” button in the Admin Center to do this. It’s also very time consuming if you have a list of users you need to do this for. I’m going to go over a few pre-requisites you will want to review, then show you a quick way to do this with PowerShell.

There are a few ways to connect to Office 365 from PowerShell, I’m going to use the Azure Active Directory Module. Let’s review what licenses you have access to, and also the services associated with each license.

#Connect
Connect-MsolService

#Get all licenses
Get-MsolAccountSku

#Get specific service details for a license
(Get-MsolAccountSku | where {$_.AccountSkuId -eq "litwareinc:ENTERPRISEPACK"}).ServiceStatus


Review User’s Current Licenses

#Create a CSV formatted file with the following in the first row:
userPrincipalName
user1@litwareinc.com
user2@litwareinc.com
user3@litwareinc.com

#Import the users and find out what they're licensed for
Import-Csv C:\Scripts\_Import_UPN.csv | %{get-msoluser -userprincipalname $_.userprincipalname } | FT DisplayName,*licenses* -AutoSize


Remove Licenses

So now that we have some information about our users let’s understand what will happen when a license is removed. Since Office 365 is a service related subscription when a license is removed they will lose access completely. Also as an Admin, or if another licensed user had access in some way will also be lost. The data will be complete removed after so many days Please review Microsoft’s documentation on Retention. You will want to backup the data before removing the license to ensure the data is not lost. When a license is removed the mailbox will be soft deleted for 30 days, then removed completely. For OneDrive, you can configure the maximum value up to 10 years so you have a little more time for cleanup. So for the fun part, here is a quick script to clean up all the licenses for a list of users:

#This requires a CSV of your user's as detailed previously
$csvFileLocation = "C:\Scripts\_Import_UPN.csv"
$users = Import-Csv -Path $csvFileLocation
foreach ($user in $users) {
$upn = $user.'UserPrincipalName'
(get-MsolUser -UserPrincipalName $upn).licenses.AccountSkuId |
foreach{
Set-MsolUserLicense -UserPrincipalName $upn -RemoveLicenses $_}}


There you have it, when you remove all licenses for a user it will really help keep things up to date. Now run the script to get all the user’s licenses again to review if they have been cleaned up. Hope this helps keeps your access cleaned up and costs down.

Single Sign-on Experience Concur as an example

Background

Single Sign-on is a great solution but can be difficult to deliver a great experience. If you are an adminstrator like myself, setting up SSO isn’t as standardized as you would hope. Recently I migrated 50+ applications from OneLogin to Microsoft Azure Active Directory. Our company adopted SSO much before we adopted Microsoft’s Office 365 and Azure. Microsoft’s features improved so much over the past year or so we decided to make the switch.

For users, they go to a single portal to find all of the apps you’ve setup for them. In Microsoft’s case, Office 365 customers can go to https://myapps.microsoft.com to access their apps. As your company connects more apps to SSO they will all show up in this same portal. That’s it, pretty simple concept! Administrators who have setup SSO will cringe at that thought, it’s much more pain on their side since each company has their own requirements on it will work for an Identity as a Service provider like Microsoft Azure Active Directory.

Example

Let’s look at Concur in more detail. To start with, they don’t provide Administrator access to the SSO settings in your portal. You will need to open a support case with them to make a change. For a company as large as SAP, you would hope their support would be top class. From my experience they respond once every 24 hours to a ticket, but if you press them they will get on a call with you to help speed things up.

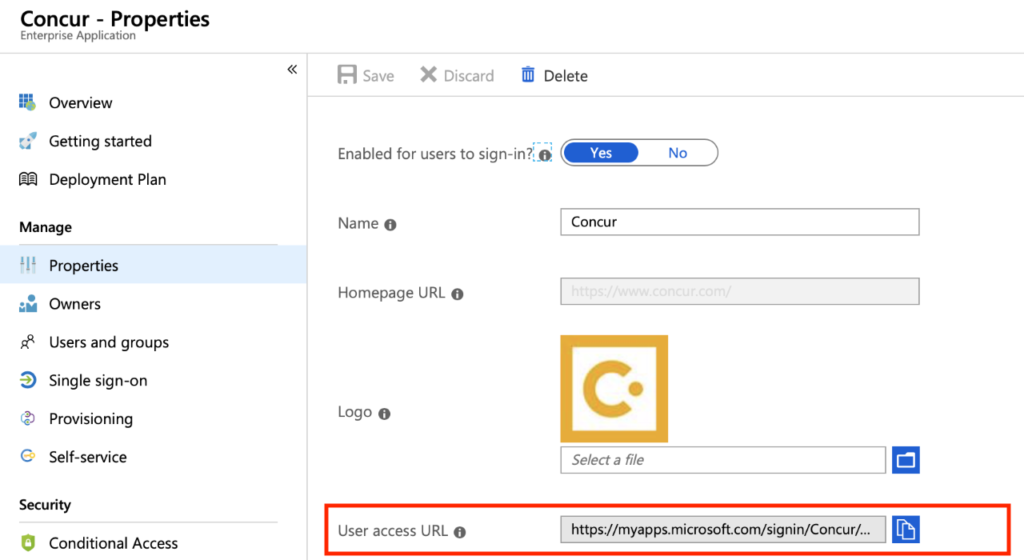
If you are an administrator setting up their application for Azure AD, the steps are documented here. After we set it up though we noticed after logging into the mobile app on iOS or Android the user would get redirected to our SSO portal, not the Concur dashboard. After months of troubleshooting with Concur and 2 identity providers I figured it out. When Concur support asks you for a “mobile friendly URL” for your application follow these steps for the “User access URL”
1. Go to your Enterprise Application you’ve setup
2. Click on Properties in the left pane
3. Copy the User access URL – PROVIDE THIS URL TO CONCUR SUPPORT

Summary

I can’t speak for Concur, but I believe they’re asking for some kind of Relay State to redirect users to your SSO application for Concur. If you provide them with the User access URL everything will work as expected. After you log into the Concur mobile app it redirects you to the Concur dashboard. Again, Single Sign-on is a great solution but can be difficult to deliver a great experience. It’s a simple concept but getting it just right for your users to have a great experience can take quite a bit of work. It will be worth it!

Create a List in Office 365 for Email reminders

Overview

Have you missed an item that needed renewed and caused the whole world to crash down? OK, maybe not the whole word but I’m sure you’ve felt the stress of, “Oh no, that certificate just expired and everyone is getting warned it’s an unsafe site!” Over the years I’ve heard lots of well intended ideas by people, “Let’s keep all of these in your IT asset management system, or you can use our contract system, or enter it as a financial renewal in our ERP system.” Time and time again, those are very cumbersome and expensive when all I needed was a simple list that could email my a notification. Say no more, let’s create a list in Office 365 and a Flow to get email alerts.

Setup

If you haven’t used an Office 365 Group yet it’s a collection of collaboration services all tied to a single group of people. All the permissions are set at the Group level and all users get access to things like a Shared Mailbox with email address, OneDrive document library, SharePoint site, etc. Let’s create a list and customize for what we want to keep track of.

  1. Create an Office 365 Group or go to an existing Group you have access to.
  2. Go to SharePoint app to see your Group – Click the New dropdown >
  3. Create a List
  4. Customize your list – add items – organize columns – etc.
  5. Add an item to your list

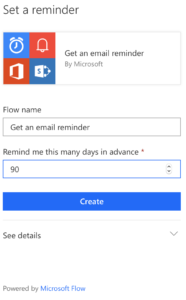
There you go! Now once you have an item added you can click the Flow drop down and you should see Set a reminder > Date Due. Since I added a column with a date, SharePoint was smart enough to create a built in Flow for a reminder based on the due date.

Summary

That’s it! Now sit back and wait for the reminders to renew your items. Flow is a built in app from Microsoft that can be used all over Office 365. Create a list in Office 365 is just one quick example of what it can do. Learn more about Flow here.

So why Office 365 and Lists? If you use Microsoft Office 365 for all of your core business collaboration solutions then it’s probably never going away. Seems like a pretty simple solution to me. Give it a try and let me know how it goes or if you any other tips.

Tips with Office 365 Email Safe Senders

Introduction

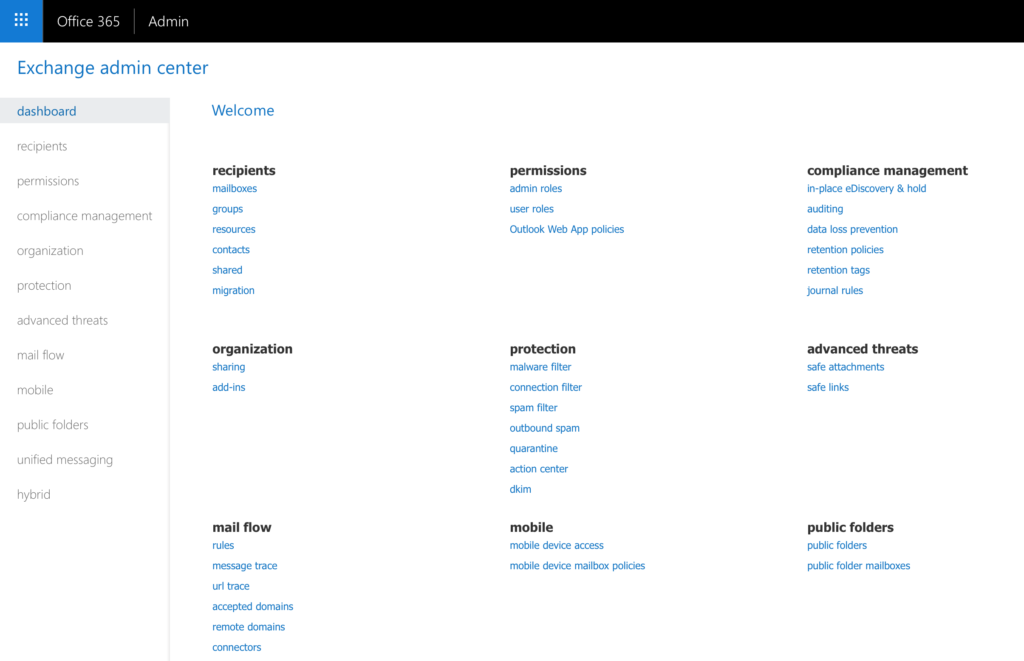
Recently I’ve had trouble with email safe senders for a domain in our Office 365 Exchange environment. Let’s take a look at some tips with Office 365 email safe senders. Usually my first place to go is the Exchange Admin Center. Now go to Protection > Spam filter > Allow lists – Add the sender/domain you want to allow. Here is Microsoft’s documentation: Create organization-wide safe sender or blocked sender lists in Office 365

Typically this is the resolution, the emails will arrive in any user’s mailbox after this. However, this was not my case this time. I went to the client side of equation to try there.

Tips with Office 365 Safe Senders

Here are few PowerShell methods to review and set rules for a user.
This will display all of the emails/domains the user has set as a trusted sender.

Get-MailboxJunkEmailConfiguration -Identity "ALIAS" | Select -ExpandProperty TrustedSendersAndDomains | Sort

In order to add a new email/domain use the following to add a truster sender:

Set-MailboxJunkEmailConfiguration -Identity "ALIAS" -TrustedSendersAndDomains @{Add="contoso.com"}

You can comma separate the emails/domains if you have multiple to add. In addition, you can edit the Blocked Senders with a similar method:

Set-MailboxJunkEmailConfiguration -Identity "ALIAS" -BlockedSendersAndDomains @{Add="contoso.com"}

Set-MailboxJunkEmailConfiguration -Identity "ALIAS" -BlockedSendersAndDomains @{Add="contoso.com","contoso.com"}

Conclusion

Hope these tips with Office 365 email safe senders will help for your users. Much more can be found with Microsoft’s Documentation for Set-MailboxJunkEmailConfiguration. You can also see more about posts for Office 365 here.

Archive Channels in Slack with Powershell

So my problem is that we’ve controlled the permissions in our account so only Admins can archive channels in Slack. Slack allows all users to create channels, great way to get things going but can get messy real QUICK. Our company has hundreds of abandoned channels and I needed a bulk method to archive them all. I haven’t worked with Slack’s API before but after about an hour with a developer at our company I could do some basics. Since I am most literate in PowerShell we set this up as a way to accomplish it. More details from Slack can be found at channels.archive

You can install the PowerShell module for the Slack API with this:

Install-Module PSSlack -Confirm:$False

Next up is then to setup all your variables, I’ll give a brief explanation of each:
$Token: Slack Legacy Tokens
$AllChannels: We’re going to get all channels that aren’t already archived
$InactiveChannels: Now were going to only get the channels where the Members are zero
$InactiveChannelsID: Finally we need to get the unique identifier for each channel called the ID

First let’s just get comfortable with getting all the channels so you can understand what you will archive. This will allow you to output how many channels, then also export all of the details to a CSV so you can review.

$Token = "xoxp-########-########-########-########"
$AllChannels = Get-SlackChannel -Token $Token -Paging -ExcludeArchived
$InactiveChannels = $AllChannels | Where-Object {$_.MemberCount -eq 0}
$InactiveChannels.count
$AllChannels | Where-Object {$_.MemberCount -eq 0} | Export-Csv C:\Scripts\Slack\InactiveChannels.csv -NoTypeInformation

Once you’re comfortable with all of these results and you are ready to take action on them use this to archive each of the channels with zero members. Archiving a channel can be reversed, you select any archived channel and make it active again.

$Token = "xoxp-########-########-########-########"
$AllChannels = Get-SlackChannel -Token $Token -Paging -ExcludeArchived
$InactiveChannels = $AllChannels | Where-Object {$_.MemberCount -eq 0}
$InactiveChannelsID = $InactiveChannels | Select -ExpandProperty ID

ForEach ($ID in $InactiveChannelsID) 
{
    $SlackURL = "https://slack.com/api/channels.archive?token=$Token&channel=$ID&pretty=1"
    Invoke-WebRequest -Uri $SlackURL -Headers @{"Authorization"="Bearer $Token"}
}

Let me know how it goes! There’s a ton you can do with Slack’s API so I’m just getting started. Hope this is a practical example of something that could be useful to you.

It’s 2019

I’ve got a confession to make, I liked Google+. I mean I plus’d Google+ ? Well, let’s just say I used it for a few years when it first came out as a “techy social media and blog” site to post on. I met some new people, posted a handful of times each month, and then stopped along with much of the users on there. Then Google decided to sunset Google+ for consumers. It didn’t bother me too much at first, I hadn’t used it over a year and heard all the rumors it was a dying attempt at Google-y social network. Then I realized, I posted some great content on there! Nothing that was mind bending, just tips and tricks I’ve found over the years as a Systems Administrator that I wish I would have kept better documentation on.

So here we are, it’s 2019 and I will never throw away helpful information again. I will promise to be an information hunter and gatherer. This updated website will be my place to do that.