Introduction
Have you run a report to see if users have setup Outlook rules to auto-forward email to an external email like their personal email? I was blown away after running a report to find multiple users who had a generic rule to forward their email to their personal email. If you’re concerned about data loss this is a big issue, let’s take a look at how to stop users from auto-forwarding email to external users.
Find out who is auto-forwarding
Take a look below at a way to setup a Mail Flow rule in the Exchange Admin Center to start blocking message type of auto-forward. You will want to use the following for:
Apply this rule if:
- The sender is located: Inside the organization
- The recipient is located: Outside the organization
- The message type is: Auto-forward
Do the following:
- Reject the message with the explanation: <Use your own custom explanation for users to see.
- Generate incident report and send it to: <email address>
Except if:
- The recipient address includes: <add any exceptions here to still allow>
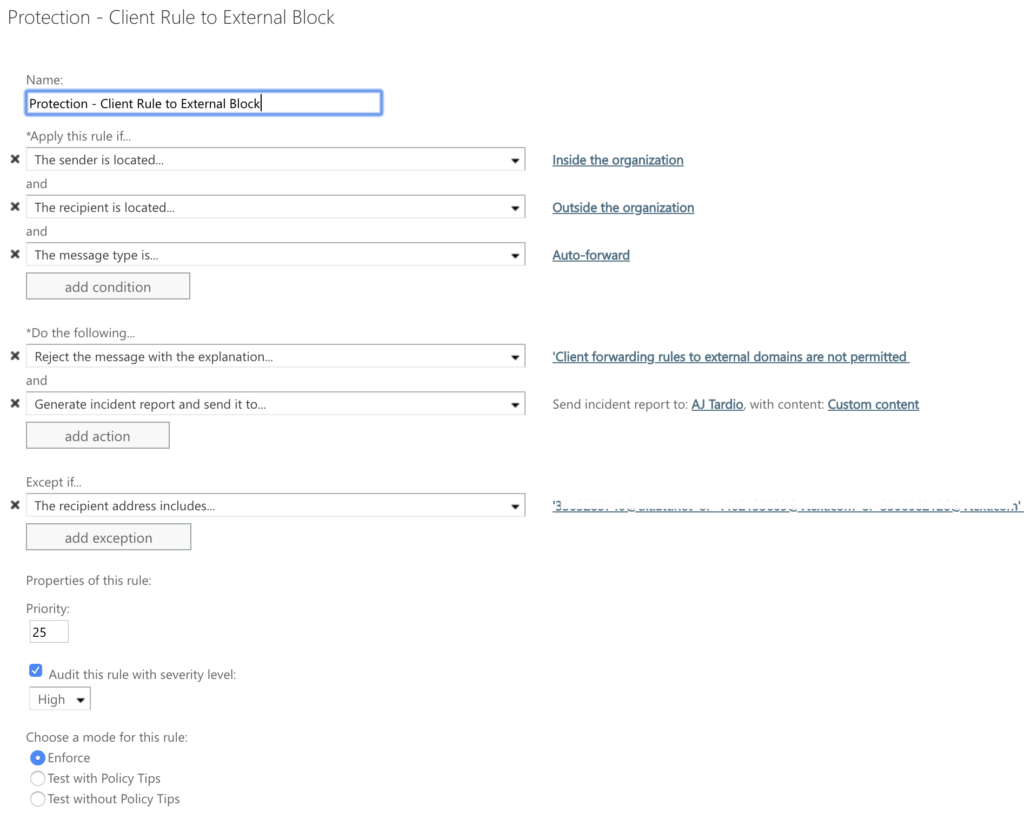
Finally choose to “Test with (or without) Policy Tips” – what this will do is start testing the rule. You will want to be sure you have added an option to send incident reports so that you can find out who is abusing this auto-forwarding rule. When you’re ready, you will change the mode to Enforce as detailed in the screenshot above.
Removing the option to Forward
There is a place in the Outlook settings that you can remove for auto-forwarding email. If you are using this for service or shared mailboxes you will want to make any forwarding changes in the Exchange admin center, not at the user level. Microsoft has documented this process, you can follow these steps in Turning off forwarding in Exchange Online. Those steps are for making a change at the user level, I would recommend making a change at the tenant level so all current and future users will have this option removed.
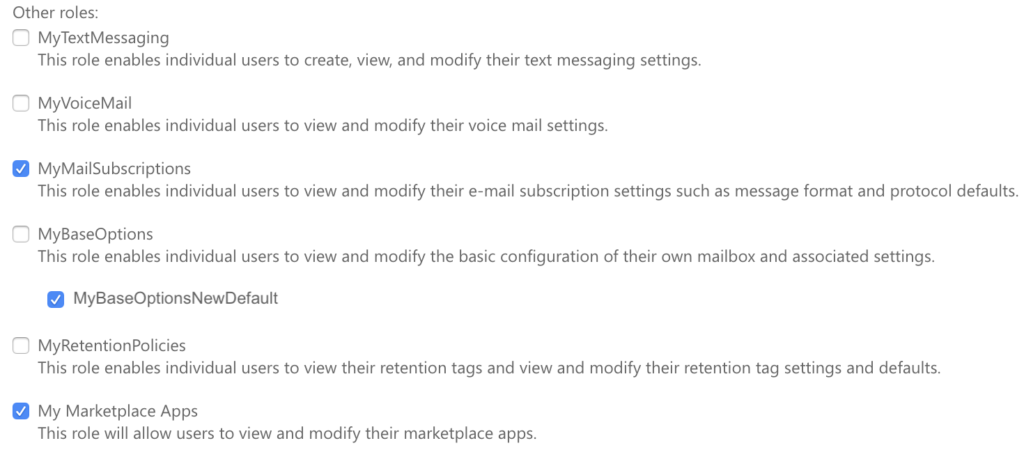
First you will need to run 2 commands in PowerShell:
New-ManagementRole -Parent MyBaseOptions -Name MyBaseOptionsNewDefault

Set-ManagementRoleEntry MyBaseOptionsFrontlineDefault\Set-Mailbox -
Parameters DeliverToMailboxAndForward,ForwardingAddress,ForwardingSmtpAddress -RemoveParameter
Once this is complete you will see a new option in your Exchange Admin Center > Permissions > User roles > Default Role Assignment Policy (you may have more policies). Now open up that policy and check the box next to the “MyBaseOptionsNewDefault” that you created in PowerShell.
Here is a before and after of what it will now look like in the Outlook web app under Settings > Mail > Forwarding (option is completely removed):
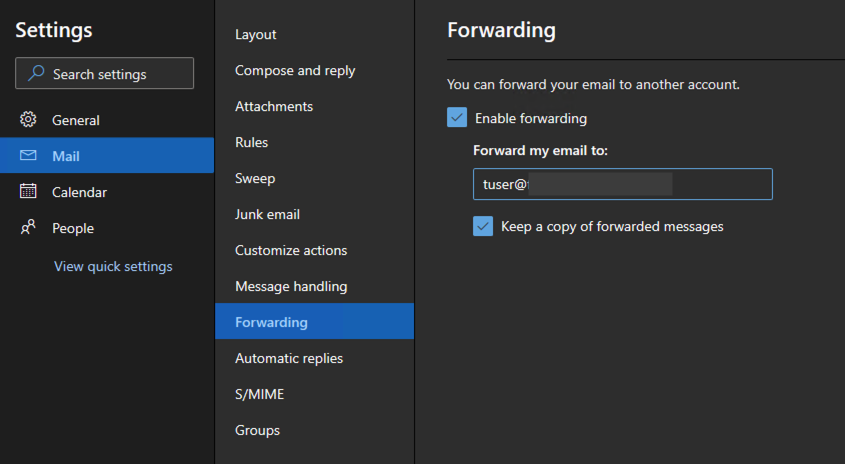
Before 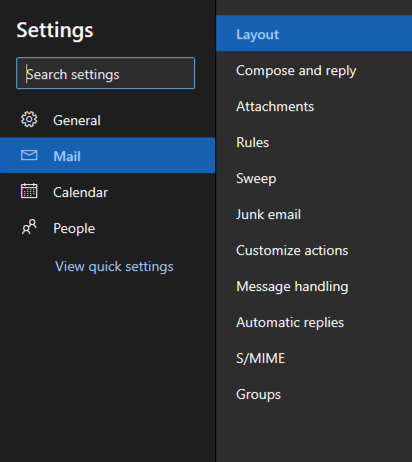
After
Conclusion
I hope this gives you guidance on how to stop users from auto-forwarding email to external users. The first step was to put up a wall with a Mail Flow rule so they can’t setup any forwarding rules. The second step was to remove the option in the Outlook user interface for forwarding all email. Users can still forward emails one at a time, but now there shouldn’t be any way they are doing it with auto-forwarding. If you liked this, be sure to see other tips in the Office 365 category.