Introduction
Have you been alerted about a drive filling up over the weekend during your monthly patching schedule? What a bad moment to get a warning like this and have to deal with before the server locks up by Monday morning. Expanding a drive can be your first reaction, but after it fills up again a few months later you dive into it by analyzing disk space only to find it’s a pesky Log folder filling up for years now. Say no more, let’s schedule a task to cleanup a log folder!
How To Schedule a Task
Here is some light reading on using forfiles – a way to select and execute a command on a file or set of files. We are going to use it to clean up a folder on a Network Policy Server.
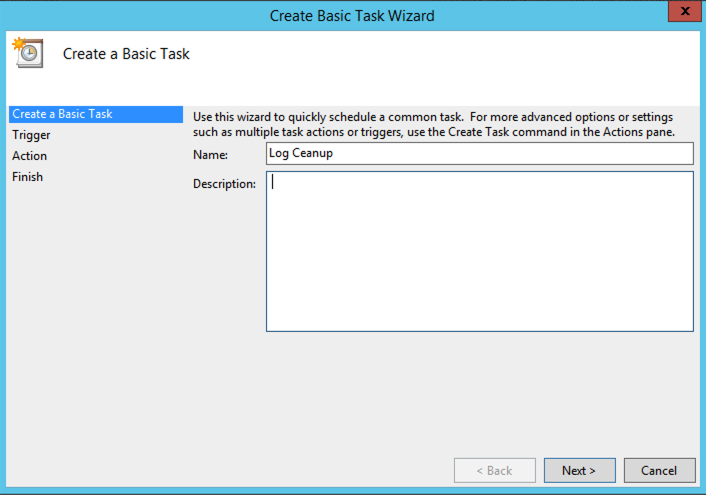
- Open Task Scheduler – Create a basic task
- Give it a Name and Description
- Trigger – how ever often you would like to clean it up
- Action – Start a program. These are the specific details I have used:
Program/script: Forfiles.exe
Add arguments: /p C:\Windows\System32\LogFiles\NPSLogs /m *.log /d -30 /c “Cmd.exe /c del @file”
Start in: C:\Windows\System32 - Once complete Run Now to see if it works – backup the folder first!
Tips
Here are a few more thoughts to keep in mind:
- If you are concerned about the data be sure to copy the entire log folder somewhere else while you test out this process.
- Run the task as a local Admin account or a service account where the password won’t change. Otherwise the script will stop running after you change your password.
- You can delete more than just log files, look above in the argument for the *.log parameter for file type. You can change this up to a different file type if your software uses a different kind.
Name 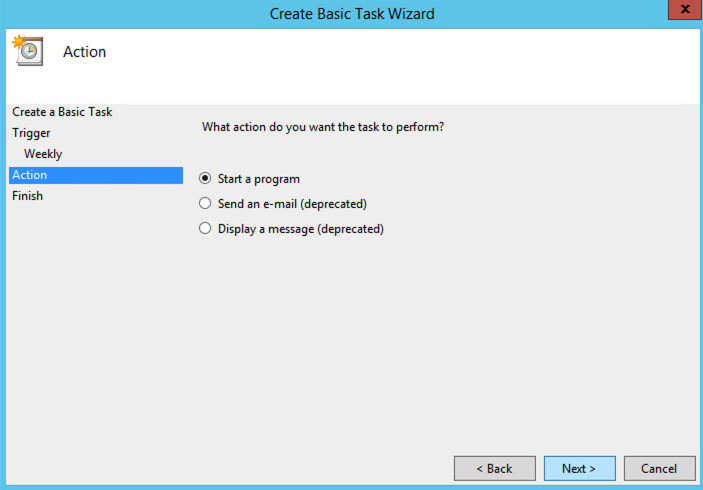
Start a program 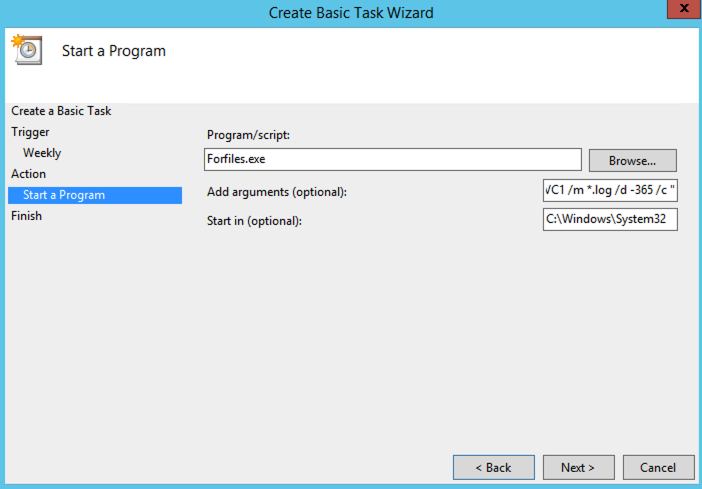
Program/script 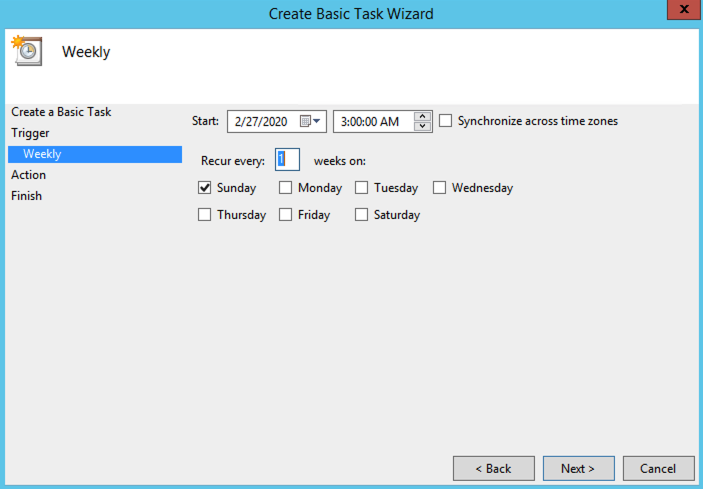
Schedule 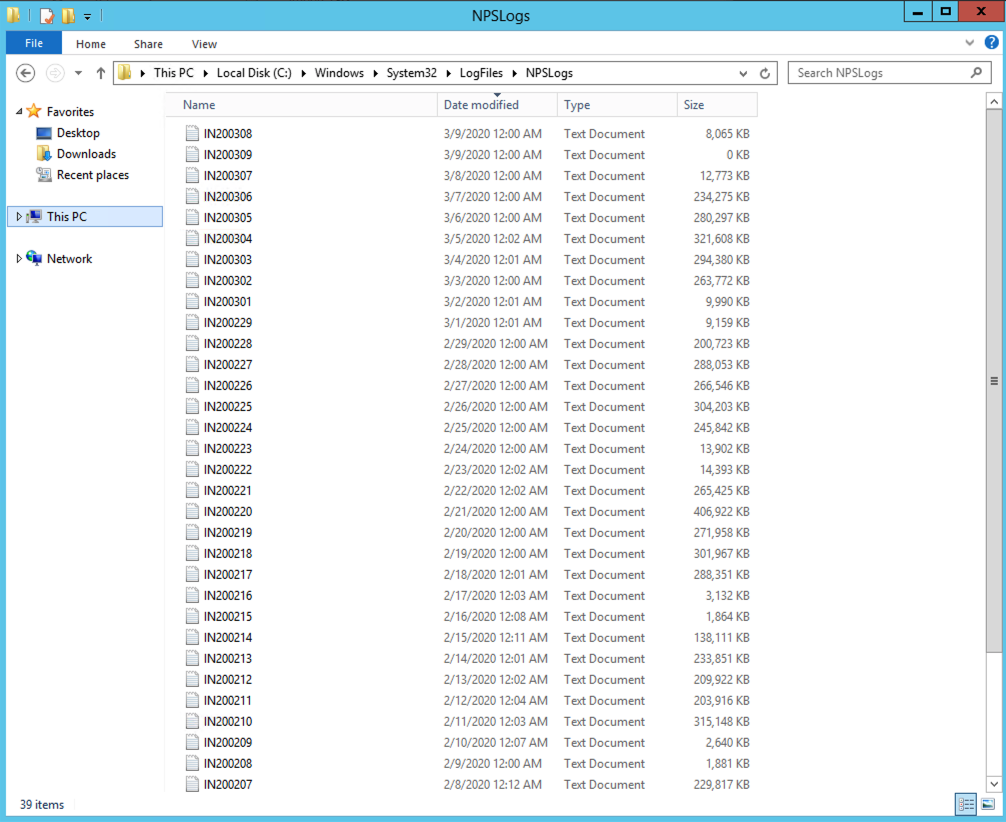
Folder Before 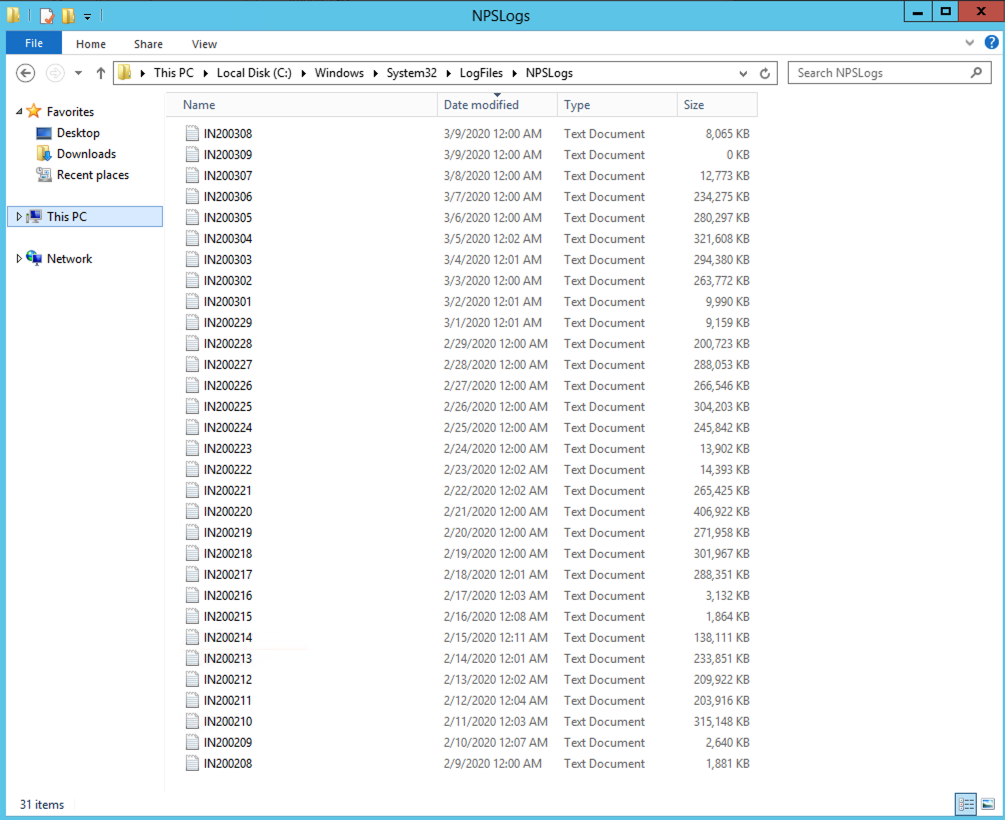
Folder After
Conclusion
Hope this helps you schedule a task to cleanup a log folder. I’ve found it’s better to be proactive about this, before you know it years have passed since you setup the server and you wished you would have taken the 15 minutes to have a scheduled task. See more posts about IT Operations here.